|
| Hardware Parts Accessories |
|---|
| Electronics |
| Guitar Wood and Kits |
| Tools |
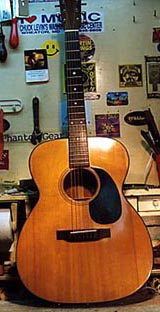
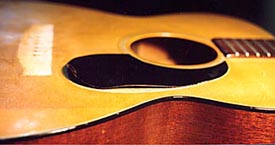
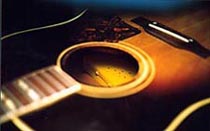
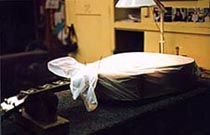
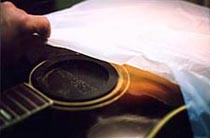
This Martin OOO-18 pickguard has curled up and away from the body. Older Martin guitars (and other makes as well) had pickguards which were glued directly to the bare wood of the top. Nitrocellulose finish was applied over the pickguard after it was installed . This gives a classic look but over time the inevitable shrinking of the plastic , hastened I believe by the reaction to the solvents in the finish which overlayed them , causes the pickguards to shrink and pull away from their original location. In some cases the topwood is drawn away with the pickguard causing the " pickguard crack" that you often see at the edges of the guard . If you are lucky the pickguard shrinks away without taking the wood with it, but cracks are often caused by this creeping action . In these cases the cracks must be repaired and the pickguard eventually becomes so distorted that it needs to be replaced. Additionally, it is not unusual that , as the pickguard shrinks , it pulls wood away so that a stock replacement guard ( available for Martin guitars) will not cover the exposed area. In these cases ( and all others where a factory part is not available i.e. most other cases) a pickguard must be handmade. 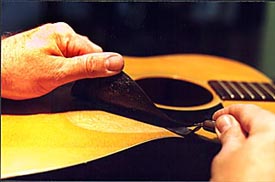 First , the old pickguard must be carefully peeled off. I like to use a thin painters palette knife. The exposed area of top wood must be cleaned and lightly sanded smooth With the pick guard removed , any cracks are glued and clamped. In some cases the cracks will not close up with clamping pressure . If the guitar has been in this state for a long time a thin spline of wood may have to be fitted into the crack but sometimes the guitar is all dried out and just needs to be humidified for a few days . A quick way to restore moisture to a guitar is to put a wet sponge , contained in a plastic box, inside the guitar. Cover the instrument with a plastic bag and put it back in its case for a few days. Sometimes, clamping the crack into place (no glue) while the humidifying goes on helps to keep it aligned while it closes. I have heard of taking the instrument into the bathroom while taking a shower (!), but I'm not comfortable trying this out on a customer owned instrument so I can't recommend it. |
|||||
|
|  |
|
| 
|
|
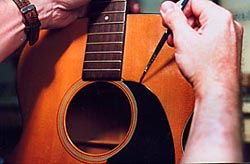
As long as the temperature is 70 or above the guitar should absorb the moisture from the sponge in a couple days. As the moisture is absorbed by the guitar the crack(s) will close up. Some cracks will virtually disappear. Others though will hardly close at all, particularly if they are severely distorted... These situations will require the spline of wood. Re-moisten the sponge if the moisture is quickly absorbed and again if necessary. 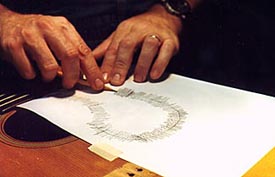 To establish the exact parameters of the new pick guard , I lay a piece of paper over the exposed wood, and with a soft pencil do a rubbing of the edge. The lip of existing laquer around the edge of the pickguard area becomes apparent ( see the dark line ?) as you rub around the edge. Do this gently so as not to mar the finish . The resulting tracing is the shape of the new pickguard. I then cut the shape out of the paper and then adhere it to a pickguard material sheet with two sided tape. The plastic sheet is then cut out and I have a close reproduction of the shape I need. With files and a single edged razor the shape is fitted exactly to the space left by the old pickguard. |
|
|  |
|
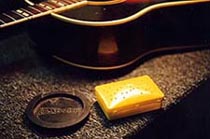
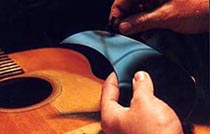
I like to refine the outer edge of the new guard with a razor and then sandpaper to give a smoothly rounded over edge. Additionally, I like to take the gloss of new plastic off with 2000 grit sandpaper and then polish the whole guard out with a polish on a wheel. I never get it as shiny as new plastic and it looks just right going back on an older instrument ! 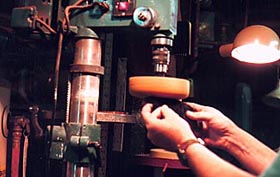
The replacement guard can be adhered with any of a number of glues or solvents, I will not recommend anything in particular because I think the jury is out on the "ideal " method. I will say that I have used - double sided tape ( some recommend a thin layer of finish over the bare wood before doing this) , hide glue , 3-M spray adhesive , they all work. I will note that I have replaced a guard that was earlier replaced with the 3-M spray adhesive and it was a mess to clean up before the next re-glue, so I no longer use the spray adhesive. I have recently been using double-sided tape over bare wood, but as with many things I am still exploring for the ultimate method. |
|
|
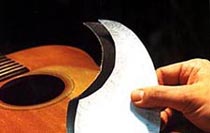
As a final touch, I like to brush on a bead of nitrocellulose laquer around
the edge of the new pickguard to create a blend between the existing finish
and the new guard. It must be built up a little, sanded and then polished
again, but it gives a more vintage/original look to the final result.
|