|
| Hardware Parts Accessories |
|---|
| Electronics |
| Guitar Wood and Kits |
| Tools |
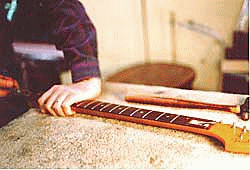
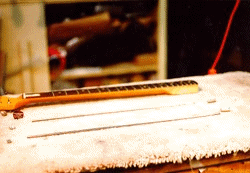
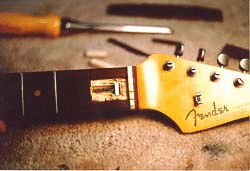
I was planning to talk about neck re-sets this month, but then a guitar came into the shop with a more unusual problem, so I thought I'd focus on it this month. The guitar was a 1964 Fender Stratocaster, the problem was a broken truss rod. The owner had recently bought the guitar and hadn't noticed the fact that the truss rod nut was floating in its recess at the body end of the neck. (This inaccessible location has prevented many an owner from getting to know their truss rod. Some might argue this was a good thing!) In any event the adjustment nut had broken cleanly off with no rod to spare. Interestingly, the neck, under tension, sat with just the right amount of relief. But naturally, this fellow wanted all of his parts in place and who can blame him. Unlike many vintage instrument owners, this guy said, "I don't care about the looks, I just want it fixed." I truly appreciate it when someone can have such reserve, and almost invariably these customers are delighted at the results, because I do care what it looks like. One of the many challenges of restorative repair is to make your work as inconspicuous as possible, unless of course you are making a big improvement! In part this means that when you replace a nut on a Martin, you cut a nut that looks like a Martin nut. In this case the goal was to get the job done with little indication that the neck had ever been worked on. This type of rod is seated in a channel beneath the fretboard. One end is anchored, the other end has a nut which can be tightened or loosened. When the adjustment nut is slack the neck can flex more freely; as it is tightened the neck stiffens. This is the general principal of most older rods. Double action rods which can exert pressure in either direction are now being used by some makers. To remove the rod either the fretboard is removed to expose the entire channel, or else the anchored end of the rod is exposed by removing just that portion of the fretboard which covers it. The rod is cut, and pushed out. This method has the most potential for an inconspicuous result, so this was my approach. The first technical point was - where was the anchored end of the truss rod located? I located the patent drawing for fender necks which indicated that the rod should end between the nut and the first fret. But I have learned from experience never to assume anything. This could be the one year that they decided to move it up to the third fret! A simple solution then came to me. I had an old humbucking pickup lying around, a big magnet. I put the pickup over the fretboard and could feel the draw of the magnet to the steel truss rod underneath. I slid it up the neck and sure enough the draw ceased between the nut and the first fret! Now I was in business. The next question was how much of the fretboard to remove. I only needed access to the channel and the anchoring nut in the center of the board. So in the interest of keeping the job as clean as possible I decided not to lift the entire section of the fretboard between the nut and the first fret. Instead, after removing the nut and the first fret, I picked a nice dark grain line about a quarter inch from the bass side, came in as similar distance from the treble side, and sawed lengthwise between the nut and the first fret. With my Dremel tool and a dental bit I cut through the first fret slot and the nut slot until I could see Maple.
The Fender rod measured out at just under 11/64 and had an 8-32 thread. The closest rod I could get was 11/64. 11/64 inch rod can't properly be threaded with an 8-32 dye, so I threaded it first with a 10-32 dye and then used the 8-32. The replacement Fender nut then fit just fine. I made a replacement anchor and tapped it to accept the replacement rod. The rod was then reinserted.
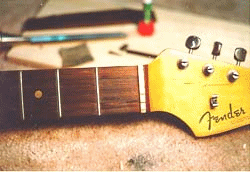
I covered the exposed rod end with a maple patch, then glued in the rosewood piece of the fretboard that had been removed. The rosewood that had been lost to the kerf of the saw was replaced with thin slivers of Brazilian rosewood I pared off an old Gibson bridge. On the bass side, the sliver blended right in with the grain line I had cut along. On the treble side the sliver was virtually undetectable.
|

 I then heated the fretboard, to loosen the glue seam between the maple
and the rosewood. From the nut side I got between the rosewood and Maple
with 1/2 inch chisel, gave it a couple of judicious taps with a hammer, and
up popped the rectangular section of rosewood.
 The anchor ( a rectangular piece of metal into which the truss rod end
was threaded) was now exposed. I removed the maple cover strip which seals
the rod into the channel and exposed an inch of the rod. I cut the rod by drilling through it with a metal cutting bit chucked into my drill press.
I cut as close as I could to the anchor so as to leave as much rod as possible
to push out the other end. The trick, essentially, was to push from the
anchor end until the rod was exposed at the adjustment nut end of the neck
enough to grab it and pull the rest of the way. I pushed all the exposed
rod in the direction of the first fret, but, alas, it was not enough to bring
the other end out of the adjustment nut recess. I tapped the extra 1/4 inch
I needed using a 16 penny nail and then grabbed the exposed rod at the other
end and pulled it out.


 This was a job that provided a challenge both in terms of intellect and
craft, and that is what makes this job so interesting! The customer was
pleased, and above all, I was pleased. And sometimes, it is harder to please
myself.